Saturday, June 28, 2008

Wildlife Photography: Tips For Better Composition.


Story:Andrew Goodall
photo:ChrisY

Wildlife photography offers particular challenges in composition, especially for beginners. You not only have to create a compelling composition (which is tough enough in itself), you also face a subject which may or may not want to cooperate.

I can't help you much with an uncooperative subject. Rest assured that with practice and experience, you will find that you become much quicker at composing and exposing a photo so that you get the shot before the critical moment passes. There are a couple of simple tips that can make things a little easier.

First, practice your photography in places where the animals are used to having people around and are less likely to become jittery at your presence. This does not have to be a zoo or other enclosure. Most national parks have campgrounds and picnic grounds where the wildlife is used to being around people, and may even come closer looking for food. You have a much better chance of a shot if you can get close without frightening the subject away.

Second, try to organise your exposure before you set up the shot. If the light is fairly constant, it is possible to point your camera in the right general direction and work out the best aperture and shutter speed settings for the photo. Then when you approach the subject, you can concentrate on composition without having to waste time working out your exposure.

These simple tips may help to take some of the frustration out of wildlife photography, but what about the composition itself? Many people simply don't know where to start. If that sounds like you, don't be discouraged. Like I said at the beginning, composition can be tough; even for a photographer with years of experience.

Let's start by breaking it down into two categories; close-up and non close-up photos.

In a close-up photo, the subject fills most of the frame. A lot of people get in a tangle over whether to position their subject in the middle or to one side of the composition. In my experience it is quite acceptable to have the subject right in the centre, as long as you allow some head-room so it doesn't appear too cramped within the confines of the composition. A central position is especially suitable when the subject is looking straight at the camera, but often works just as well if the subject is facing a little to one side or the other.

The more space you have around the subject, the more you should consider putting it to one side or the other. In this you should be guided by the way the animal is facing. If it is looking to one side, position it a little towards the other side so it is looking toward the centre of the frame. So, if your wildlife subject is looking right, position it a little to the left. Not too far; you don't want half of your photo to feature nothing but empty space.

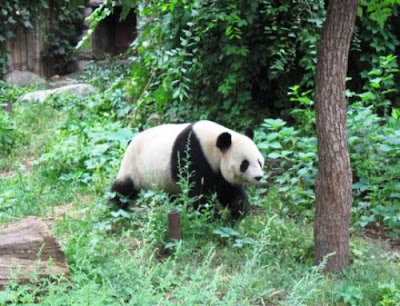
In a non close-up, where the photo shows a lot more space around the animal, it becomes more critical that you use that space effectively. In situations where the animal is featured with a lot of background, it may be better to think of the picture as a landscape photograph, and compose it accordingly. Some of the tried-and-true techniques like the Rule Of Thirds (google it if you are not familiar with it) are a good way to help you position your subject within the overall frame of the picture.

For a landscape style photo, it may look quite unbalanced to position your subject in the centre of the picture. It is usually better to position it to one side or the other, and it is now even more important to have the animal facing toward the centre of the picture. The eyes of an animal subject can have a strong effect on the direction in a composition; we tend to look where they are looking. So if the animal is on the left and looking left, the visual flow of the composition will lead out of the picture, instead of into it. If the subject is on the left and looking right, the viewer will follow the gaze of the subject into the centre of the picture.

Naturally it helps if there is something of interest in the centre or to the right to catch the viewer's attention and add interest to the composition. If the subject is looking into the composition, it makes sense that it is looking at something, not just at empty space. Almost anything will do...a tree, a beach, an impressive sky; as long as it adds impact to the composition. If there is nothing of interest to work with, you might consider zooming in closer, so there is less emptiness in the composition.

These simple guidelines are intended to do nothing more than give you some ideas. Nature is not governed by the rules of composition, and a wildlife photographer must be flexible to get the best result out of each situation. Most importantly, trust your own sense of visual balance when arranging a composition. On the other hand, if you are struggling to get started, think back to these guidelines; if you can position your subject well, the rest of the composition will fall into place.

About the Author

Check out Andrew Goodall's popular wildlife and landscape photography at http://www.naturesimage.com.au , and learn from his experience with the top selling ebook "Photography in Plain English." Don't forget to sign up to the online newsletter for tips and updates...it's free!

Saturday, June 21, 2008

Become A Better Photographer With Free Online Training


Photo by:ChrisY
By Michael J Kryzer


If you have just started selling your photography you have probably realized that it is worthwhile learning everything you possibly can about professional photography techniques. But how can you take some photography training while your income from selling photos is still building, without breaking the bank?

That is the question many new freelance photographers face, as they move from taking photos as a hobby to professional photography that needs to pay the rent. Fortunately there are some great training videos available online, and they are free.

Without a doubt, freelance photography is one of the best businesses that you can operate from home. You can work when you want, and - in many instances - where you want. If you want a day off you can take it. And as a freelance photographer you have several alternatives when it comes to selling your photography. You can sell your photographic services for weddings, portraits and even corporate business needs, or you can sell your collection of images as stock photography.

Your success as a freelance photographer will come down to your ability to consistently take high-quality photos that clients will pay for. And that means knowing the same techniques that other professional photographers use.

So where can you learn these techniques online for free? One of the best places is YouTube, where people post videos on all sorts of topics. To get to the photography training, go to YouTube and search for "photography", "photography lessons" or "photography techniques".

You will be pleasantly surprised at the high quality of training videos that are available. Discover how to position your models, how to set up a studio, how to arrange lighting and reflectors, and how to frame your subjects in order to get the best image. You will be able to choose from lessons on portrait photography, baby photography, night photography, using light meters, advanced digital camera techniques, and more.

Don't forget, after watching all these training videos, you will only really learn it by doing it. Get out there and practice the same techniques. By doing this, over and over again, it will become second nature to you. Then you can concentrate on taking some more great photos to sell.

Michael Kryzer is the co-author of "Sell Your Digital Photos". If you would like to learn how to sell your photos and build a freelance photography business, visit http://www.CameraCareer.com

Article Source: http://EzineArticles.com/?expert=Michael_J_Kryzer

Sunday, June 15, 2008

How To Manage Digital Photography Lighting

By: Connie Fillmore

Photography blends science with art. The photographer is the artist who engraves his creation with light and shade. Science has gifted the artist a technically advanced digital camera for him to captivate life with it. But he must know to decipher the codes of light

And, Let There Be Light...

Natural light sources like the sun and the moon are considered the best light sources. These lights often invade indoors and make natural shots come alive. Men have created artificial lights like the ordinary bulb, the tungsten halogen lamp or the bright photoflood.

There are various types of lighting, the photographer can employ. The most common is the Directional lighting provided by flash, tungsten or several sources and can be used from the front, back or side.

Front lighting is the most in vogue but it reveals every detail. The light is at the back of the photographer beaming at the face of the subject highlighting every detail. This often results in an unexciting and flat look of your subjects. Another technique is to mystify your subject by lighting up from side. The main illumination from side adds interest and vigor with presence of dark shadows.

In Back lighting the source light remains in the rear of the subject shining in the face of the camera. So, you must be very careful while using this mode otherwise the subject will appear like a silhouette. The main advantage here is, you will be able to capture the natural expressions of your subject in an outdoor shoot, as he will not squint facing bright light.

You can employ Cross lighting where strong directional light comes from both sides. But this method is only suitable for studios with bright flash or tungsten lights.

Lighting For Digital Photography


Digital cameras may offer a wide range of easy lighting modes but there are challenges for the artist in his path to perfection. You must adopt the trial and error method and acquire the knowledge of lighting.

Most digital cameras have preset digital photography lighting modes or 'scenes' for different lighting situation. There is the indoor mode to click without flash, which is particularly useful in art galleries or museums, the night and portrait mode allows you to take pictures of your subject with a gleaming backdrop at night using a slower shutter speed.

The digital cameras provide an automatic setting for white balancing .You can determine the baseline white in your image against which, other colors will be rendered. Your camera may have a histogram to evaluate exposure in different digital photography conditions. Most cameras have various options like daylight, cloudy, tungsten and more.

What Is Auxillary Lighting?

If you want to create art using light and shadow, the Flash unit alone is not enough. Here, auxiliary lighting comes in. If you decide to shoot portraits or product shots in a studio then auxiliary lighting is not optional but necessary.

For great results use head and kicker lights. Flashlights do not generate heat like floods and spots, so are more suited for portraits. Make sure the flash suits your digital camera. If you want to shoot still shots or product shots, continuous tungsten light is the cheapest and best. A range of wattage bulbs and reflectors will help you control the intensity and direction of light too.

If you don't have money you can rent lights. Top studios have various assortments of flash units, flood and spotlights.

How to use light

Light is made up of all colors. If seen through a prism it bursts into different colors. You are free to experiment with the rainbow. Artificial lights have their own characteristics. The photographer can utilize different light sources. You can alter white setting for a different effect. Most digital cameras have color setting modes to achieve accuracy of the colors.

Direction of light is important in digital photography. People look best in diffused sidelights and backlight produces a halo effect while overhead lighting produces sharp contrast of light and shadows. Strength of light is also an essential factor. You can have placid effect from diffused lighting and sharpness from strong light.

Indoor lighting gives you ample scope to shoot nice pictures. You can assemble light as per your choice and can even harness sunlight when it enters your house to soften your image.

Outdoor shots are more challenging. It leaves you at the mercy of Mother Nature. While landscape looks good in soft light, the wildlife is captivating with fine details in bright light. So photographers try to capture wildlife just before dusk or before dawn.

In digital cameras, you do not need to worry about ISO film speed. Most digital cameras have preset ISO setting. However, experimentation is the perfect way to curb imperfection. So inflame your imagination and hone your skill. You are ready to enter the luminous empire of photography.

About The Author

Connie Fillmore is a successful writer and publisher of photography related issues, for more informative articles go to http://www.digitalphotographyguy.com.

Saturday, June 7, 2008

How To Take Stunning, Lively And Ravishing Pictures


Photo:visuallens

Story: Connie Fillmore


Photography is digital SLR photography, at least to any self-respecting photographer. Suggest otherwise, and he is sure to give you a piece of his mind and proceed to praise the virtues of digital SLR photography.

Digital SLR photography uses a digital SLR (Single Lens Reflex) camera that uses a movable mirror placed between the lens and the film to project the image on to a focusing screen.

Digital SLR photography churns out the most amazingly realistic photographs, in fact much better than the ones turned out by the conventional fixed lens cameras. But its prime appeal to photographers, both amateur and professional, is in the fact that he can work out a large amount of control over how his pictures end up as.

Digital SLR photography is all about customized photographs that are stunning to look at, to say the least. This is because the cameras come with extremely good lenses. This is why the discerning photographers are not miserly about getting a lens, frightfully expensive they may be.

However, digital SLR photography enthusiasts should never think that a swanky Nikon or a Canon is the passport to great photography. The apparatus notwithstanding, good photography depends a lot on the skills of the person brandishing the camera. The basics of digital SLR photography are not hard to pick up.

The first and foremost tip about digital SLR photography is to equip yourself with the nitty-gritty of lighting. If you are shooting outdoors during the day it is best to have the sun directly behind you. It is also essential that your subject also does not have to face the sun so that he has to squint. You should know that the best time to film landscapes, buildings and outdoor portraits is either dawn or the twilight hours.

If you want to impart the warmth of the rising or setting sun to your midday photo shoot, then a skylight or a warm filter is your key.

Tips to great digital SLR photography insist on maintaining control over the camera's flash property. To be precise, don't have your camera have the last word about where the flash should come on. Take the reins yourself and ensure that your photograph subjects are not lost in a maze of bright light.

Good photography, digital or analog, SLR or otherwise, is all about being able to use the filters right. You never know when that polarizer or the gradual filter or the skylight/UV filter might come to your rescue at times when the light situations are tricky.

The Macro Mode atop the camera just happens to be the most underrated and under-used feature. But unknown to many, this mode is great for taking enchanting close-ups of tiny objects.

Realistic and stunning digital photography is actually the norm with plethora of controls that come with modern day digital SLR cameras. And photography tips harp on tinkering with the controls to get a hang of the controls and the outcomes they produce.

Experimenting for instance, with really slow (30 seconds) extremely fast (1000th-8000th/second) shutter speeds can produce dramatic results. The ISO setting is another area for experimentation. In fact, high ISO values come in quite handy when you cannot use a flash in low light situations.

Get well up on your digital SLR photography tips and tricks and shoot at sight willingly.

About The Author

Connie Fillmore is a successful writer and publisher of photography related issues, for more informative articles go to http://www.digitalphotographyguy.com

Custom Search